
Interior Construction
The construction of the interior started as soon as the hull was rolled over and the bilges painted. It was intertwined with the completion of the shell as some of the external paintwork could not be undertaken in winter due to low ambient temperatures and, in all cases, it is good to have more than one front open on such jobs. Sourcing materials required in one area can be done while effectively working elsewhere.

Building the companionway area was a welcome priority. The engine had just been installed, but could have waited until very late in the build with benefit: a near straight vertical lift through the sliding hatch is possible at any time.
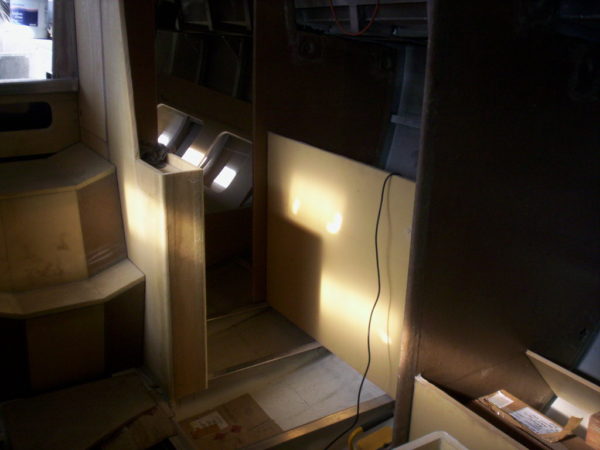
Starting the galley area. The cut-out for the gimballed stove will be finalised in place. The most effective way of cutting neatly through foam-core panels is using a jigsaw with a fine-toothed metal blade. The glass laminate takes its edge off immediately, but a single blade lasted through the entire build.

Sandwich panels that were to be tied into the framing were manufactured and bonded into place.
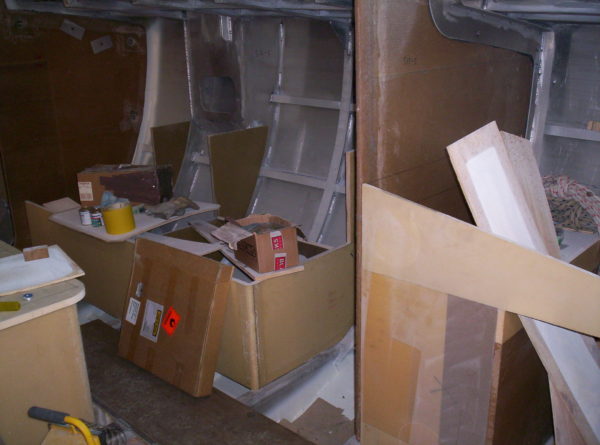
The starboard saloon side started. Note the painted hull plating in the bottom.
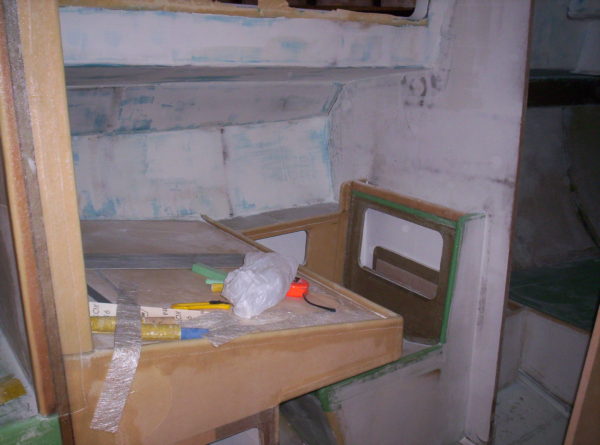
Construction of additional items not in contact with the hull plating was also undertaken.
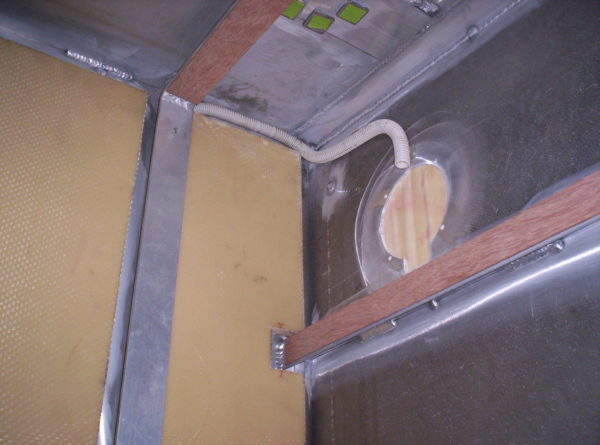
Conduit was installed to carry some of the wiring into hard to reach locations.

Spraying two-part expanding closed-cell urethane foam to cover the hull plating and framing from the waterline up made a horrific mess of the tidy interior, turning the place into a snow cave.

Digging a way out of there was the appropriate way of looking at it. The foam was progressively trimmed, faired and lightly fibreglassed throughout to form a lining. The best way to attack the foam is using a twist-knot cup wire brush on an angle grinder.
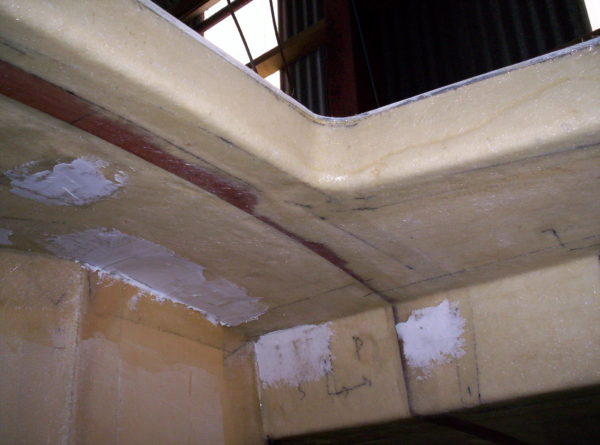
The evil task of shaping and glassing the foam did allow obtaining any shape very easily.
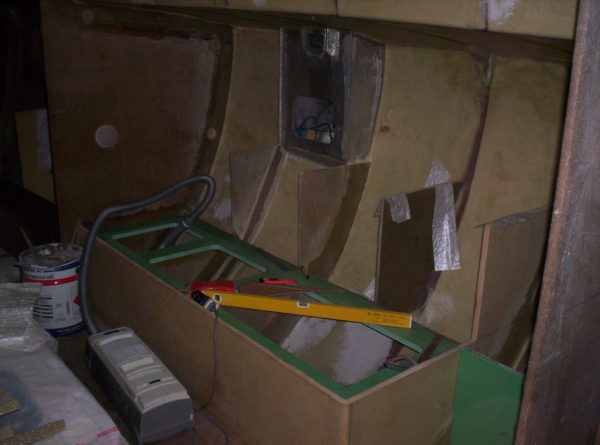
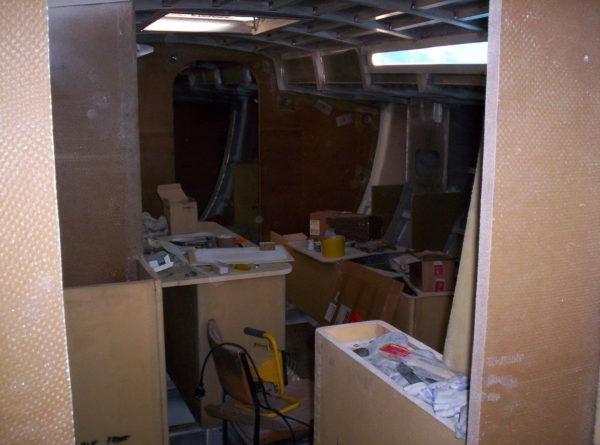
Steady progress was made assembling the interior from composite panels. The use of PVC foam core/E-Glass results in a very light and strong fit-out, but is more costly and labour intensive. The gains in vessel displacement are significant however.

Each piece was produced in the workshop on a flat table. Warped composite panels do stay warped.

The chart table area with a fuel tank in place. Fuel can also be carried in the keel foil, but gravity-feeding the engine makes for a more reliable and dependable installation.
Building up into the hull sides. An accurate construction plan for everything means no time was spent wondering about the layout and hull volume was utilised efficiently.

The port side taking shape.

Aft cabin with bunk base. The aft panel seals the lazarette.

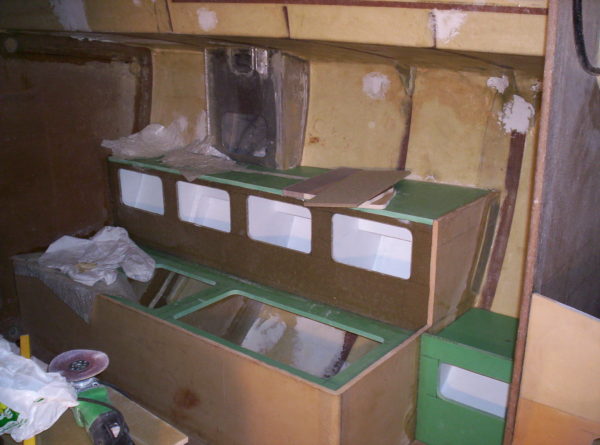
The gimballed stove being fitted in the galley. One shall preferably refrain from cooking the thinners.
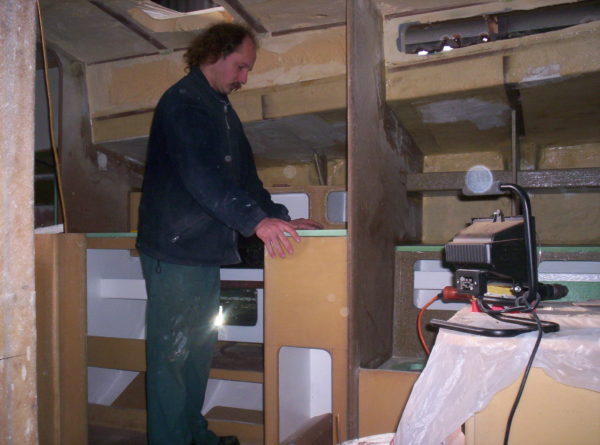
Builder standing at the sink late one night – now looking older. Note the inside of the lockers now flow-coated white. At this point, even without deck hatches, the 500-watt floodlight was able to heat the interior noticeably in winter.
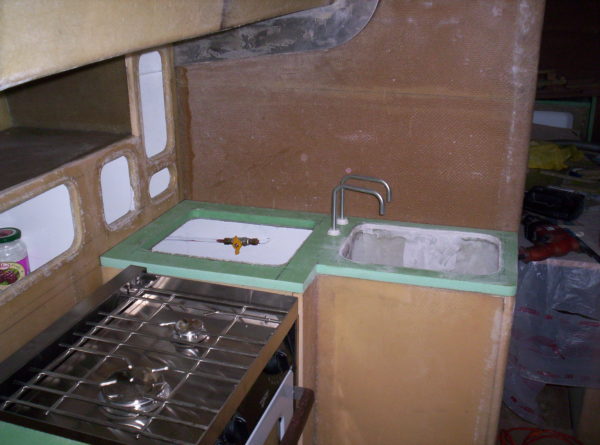
Galley with stove and sink. The sink was custom-made out of fibreglass on a mould to obtain a shape that always drains fully, even heeled.
Fairing of the glasswork inside was not too onerous.

A little filling and sanding, basically.

Just a little more…

And some more again, but with the locker doors in place now. All the cut-out pieces were marked and saved. Fitting piano hinges to composite panels is one of my favourite tasks. There were forty-seven of them throughout.

Only a little more in the forepeak. Having a workbench in an ocean-cruising yacht is great and the forepeak is no place for sleeping quarters.

Epoxy undercoat… sprayed and then finely sanded. A good ducted extraction fan is essential for spraying inside.

And two-pack semi-matt polyurethane topcoat: one 18-hour shift with the spray gun, forepeak excluded. It is a matter of strategy to progress from the far surfaces towards the centre, apply two coats everywhere and leave the scene unnoticed: without dragging the air hose onto anything freshly painted.

Plumbing work started. One foot pump for fresh water and one for sea water at the galley: simplicity, dependability and effectiveness.

Doors and catches were fitted. The stove is there to stay this time and now I could even make a cup of tea on board.

Table tops were covered with veneers and varnished with two-pack polyurethane. A false panel at the chart table will provide space for wiring behind.
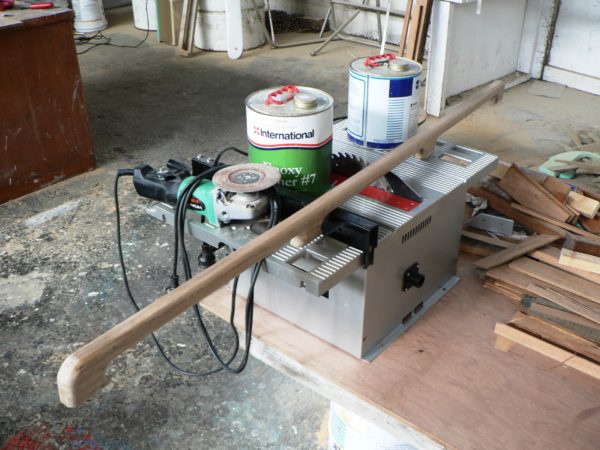
Change of trade: hardwood trims were machined, epoxy-glued into place and later varnished.

The saloon table top under construction. The base panel is foam core and fiberglass for lightness, but will look like solid timber once finished. The corner pieces were all turned on a lathe.

Extensive use was made of a powerful router and jigs for the woodwork. I like wood dust just slightly less than filler dust: very little. I find hardwood dust – in particular – to be a more effective irritant.

Grab rail along the saloon table.
More wooden handrails… those were curved and marked in place.

Finished saloon table. The composite floorboards also made a welcome difference inside.

Finished handrail and window trim. All roof windows were double-glazed. The hard, washable, textured finish on the deck head was achieved using a thick industrial epoxy coating and a simple roller.

Finished composite floorboards: a synthetic non-slip flooring material rated for use in hospital showers was used. Note the cabin diesel heater under construction, the outer heatshield is still missing.

The cabin heater, finished here, was specially conceived to operate in the insulated volume of the boat. It features a smaller burner and higher efficiency than commercial models, leading to lower consumption. Most of the heat generated flows out of the gap between the fire box and the heatshield as hot air, rather than radiating from dangerously hot surfaces.

The aft cabins lining was doubled with thick EVA foam sheet glued in and later covered with a synthetic carpet.
Some engineering tasks were also documented, as well as the project completion.
Hi Eric,
Are the water tanks under the saloon settees or have you managed to find some ingenious way to store water(fresh of course!) in the bilge. Do you use any of the bilge for storage? And what is hidden under the saloon table?
In another post you claim that much so-called naval architecture is actually more interior design than external hull shape and while you have obviously taken great pains with the latter, you seem also to have paid a great deal of attention to what is – or perhaps isn’t – inside.
Regards – Peter
Peter,
Answering several questions in one go (!), the water tank is in the lower part of the table base, which is made out of 20mm PVC foam core and E-Glass/epoxy inside. It is subdivided into two independent tanks of 75L each and three valves in a U-shaped arrangement allow to couple the tanks or feed the front of the boat separately from the galley etc.
If I want to carry more water, I fit it in 10L square plastic jerrycans in the bilges (which are around 300mm deep around the keel). I always make a very liberal use of seawater on board and an average of 2L/person/day is ample for freshwater.
Carrying drinking water in aluminium tanks is not great. Fresh tank water on board is semi-stagnant, doesn’t have a great oxygen content and the metal doesn’t like it that much after a while. Stainless steel is a much better choice for a metal fresh water tank, but it would have made no sense here as the foam core construction already offered the perfect tank material.
Building fresh water tanks directly into the hull would have been even worse in the sense that now a critical part of the boat would have become very difficult to access and exposed to degradation on the long run. Fuel, on the other hand, is fine straight into the hull provided the tank outlet is at the lowest point (no accumulation of nasty substances), but even then I opted for an independent welded alloy tank. I can fill the keel foil with diesel however, something intended for wintering over in very cold places.
I have paid a great deal of attention inside to ensure there weren’t multiple heads, more bunks than I could ever possibly use, wide open spaces to fall across with little to hang on to, little volume for storage, storage in the wrong places (i.e. huge cockpit lockers), a chart table that can’t take a chart, little screens everywhere… what else? Just about every must have “feature” found these days. This way I got a modern high-performance boat with sensible arrangements and simple functional systems.
Regards,
Eric
Hi Eric,
Did you peel ply/vacuum-bag entire composite panels or simply roller epoxy into the roving and fill it after, before cutting them into parts and can you reveal the reason for the use of the brown(mostly vertical) panels and the green (mostly horizontal) panels?
Also, what sort of weight-saving did you achieve using composite panels instead of ply?
Thanks – Peter
Peter,
When I started, I was able to source Klegecell PVC core, which was brown. Later, the supplier only stocked the higher grade green Divinycell.
I cut the foam to shape first and checked the fit in the boat, then glassed both sides of the panels on a large flat table. The best tool for working the resin on flat surfaces is simply a large putty knife. Rollers are slow, messy and difficult to clean afterwards. The pressure from a flat blade lets you press the glass down onto the resin and it gives a strong, resin-lean laminate.
Each panel was then glued into place and only the corners were shaped and glassed in place.
I saved hundreds of kilograms when compared to a marine plywood fit-out. The fit-out is one of the few places where you can really save substantial amounts of weight. Building light is more labour-intensive and more costly, but you benefit from it forever after.
There is a very light marine plywood called Goldcore Light you can get now. It is not as light as a foam core panel, but it is way ahead of the traditional marine ply as far as weight goes.
Regards,
Eric
I think that I see that you have bonded a thin strip of something to the ribs/frames – what is it?
Also,whilst I see that you have filled between the ribs/ frames with insulation and then glassed over the insulation there appears to be none where the ribs are – does this cause cold spots?
PS. Can one purchase your plans?
James,
You are an acute observer. The strips you noticed are plywood and they acted as a gauge as to where to stop when trimming the foam insulation. Their insulating value is inferior to the foam indeed and there would be better materials to use. Overall, they have been reasonably adequate. Their surface area is quite small, so heat loss is not an issue, but some light condensation can happen at times, not enough to drip.
Deck hatches are infinitely worse from this angle and I would tape clear plastic around the openings to “double-glaze” them in very cold regions.
No issues with selling any of the plans.
Best regards,
Eric
Thank you.
I had the same problem from Hatch and Portlight surrounds when in North of Norway for 3 years and Svalbard one very icy Summer
If I was to build ( and would love to)an Aluminium Yacht I would have no fittings fixed by drilling through the deck but would put everything on a
raised pads.
I note too ,apparently, no windscreen / hood….does that cause a problem ?
How much for the plans? I can but dream!
krs
james
James,
My experience with fastenings and aluminium is that you are better off drilling through and sealing very well with a product which stays soft (like Sikalastomer-710, never use a urethane adhesive, or use a foam rubber tape instead of sealant) rather than tapping into aluminium. If seawater gets into a thread between aluminium and stainless steel, you will shear the fastener trying to get it off and this is just the beginning of your problems as you still have to free the hole without destroying the thread after that.
All my hatch frames and windows are bedded on foam rubber tape and can be lifted off and put back into place without any issues.
No hood, windscreens and the like for me, I don’t need the windage and when I go outside I want to be able to see what I am doing and manoeuver without hindrances. A lot of cruising boats these days are incredibly awkward to handle and sailing seems to have been the last thing to have come into consideration…
When I have nothing to do outside, I don’t hang around the cockpit as the vane handles the helm all the time. The cockpit is quite deep however and if you sit behind the roof, you are well below deck level and almost completely out of the wind. With the windows at head height, you can see outside from the cabin.
When I designed this boat, I was doing it for myself and I stopped when I had everything in 3D CAD and calculated, besides some CNC cutting files and full-scale frame drawings. I went back to the 3D model for everything else as far as dimensions and details were concerned. In order to sell the plan, I need to produce a set of drawings and the price would need to cover that, but you would only be looking at a few percent of the cost of the project…
Producing the drawings “in advance” would be a waste of time. The new boat/custom built market is incredibly tiny and, in most cases, when you spend that kind of money on a new boat, you also want customisations and they immediately invalidate some of the drawings.
Kind regards,
Eric
Thank you for taking the time to reply….happy sailing.
krs…james
James,
It is the least I can do, you are very welcome.
Kind regards,
Eric
I am drawn back time and time again to your build photographs and here are a few more questions.
1) How do you stop the cut outs that you carefully marked and saved from falling straight through the panel when you put them back, as I can see no supporting lip?
2) Did you glass over the edges of the cut outs and in fill panels?
3) When painting the Bilge I note that you only sprayed about half way up the hull framing – why?
4) Had you,cleverly, allowed for some of fixing on the cabin superstructure to bolt the handrails to just below the portlight,as one suspects that neither the sprayed foam or it’s covering would have enough strength.
You are very welcome. I will take your questions in the same order here below:
1) A lip needed to be built up afterwards, usually using a strip of foam pre-glassed and then bonded into place. It doesn’t always have to fully surround the opening, like in the case of vertical door lockers. These have the hinge on one side and a back stop near the catch. The foam had to be removed and a strip of plywood inserted to allow fastening the hinge of course. A foam-core interior is a lot of work in this regard.
2) Yes, I glassed over all edges. This requires trimming the edge before building it up again.
3) The purpose of painting the bilges is eliminating long-term corrosion arising from pitting due to dust, dirt and dampness sitting against bare metal. Aluminium will pit in an environment where it is deprived of oxygen. The vertical sides of the floors and girders are not prone to these issues, so they don’t need to be painted.
4) All the hardwood handrails inside the cabin were designed with spans matching exactly the frame spacing, so they are bolted into the flanges of the aluminium frames through the plywood strips you had noticed earlier. You can lift your whole body weight on any of them.
Best regards,
Eric
Reading again about the mess that ensued after spraying the foam and then having to cut / fair back one wonders if it might have been easier to bond a barrier such as a sheet of epoxied glass cloth to the ribs drilled a series of small holes and then injected, through them into the void behind ,the foam ,rather than the other way around.
When laminating the Klegecell Foam Core one would suppose that you were only able to apply the Glass Colth to one side at a time, did this lead to any bowing of the flat sheet?
As always..Thank you for your attention.
I couldn’t see that working at all… voids everywhere, the foam pushing the barrier out of shape… What you can do is spray the foam thinner and then cover it with traditional panelling and you have an air gap between the top of the foam and the panels. Fitting and fastening panels is time consuming too and the result is both heavier and inferior to glassing a thin waterproof lining to the foam after shaping it. On the other hand, on the roof you can remove the panels and access the underside of the deck afterwards. On the hull, you would be wasting quite a lot of space because the back of your lockers is unlikely to follow the shape of the hull very closely.
Trimming the foam up to the deck was quick and easy. Most of the mess came from the overhead surfaces, so you could combine the two approaches quite successfully.
I laminated the foam panels one side at a time indeed. They stay dead flat if your table is flat, then you flip them over and do the other side. However, sometimes the foam can have a slight bow if it wasn’t stored quite flat. You just place a weight over a plastic bag on your wet laminate while it is curing. A can of paint does quite a good job at that. Once the first skin has cured, the panel keeps it shape.
Best regards,
Eric
Thank you.
You are quite right about the foam probably pushing the barrier out of shape, as always one is looking for a quicker( lazy short cut) way of doing things – which inevitably does not achieve the objective!
krs
james