
Engineering
A certain amount of machining and engineering was involved in the construction. The machining of the rudder stock over one Easter weekend (when the workshop was deserted and quiet) was not documented, but a few other tasks were.
Engineering tasks are great on a build like this. They provide a welcome break from fabrication and painting work.
Propeller Shaft
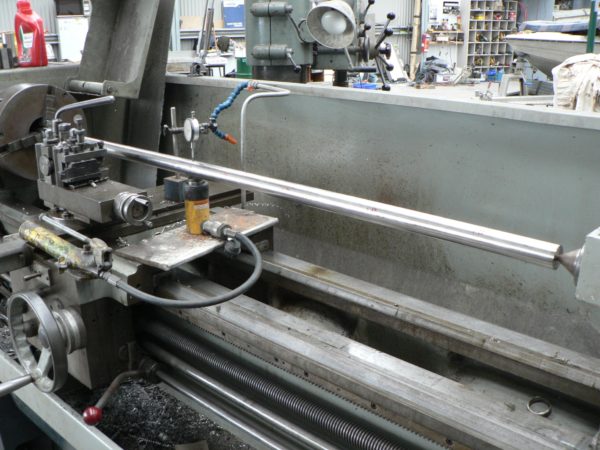
The stainless steel propeller shaft was checked for straightness and corrected in the lathe using a small hydraulic jack.
Machining of the ends is best done away from the chuck once a centre has been established. Note the little shims where the shaft is clamped in the chuck: they are needed to hold it without bending it.
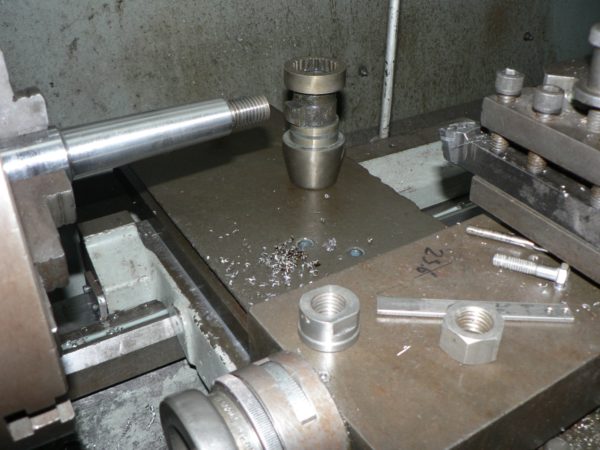
The thread was cut once the taper was finished. Nearby is the boss of a Max-Prop feathering propeller.

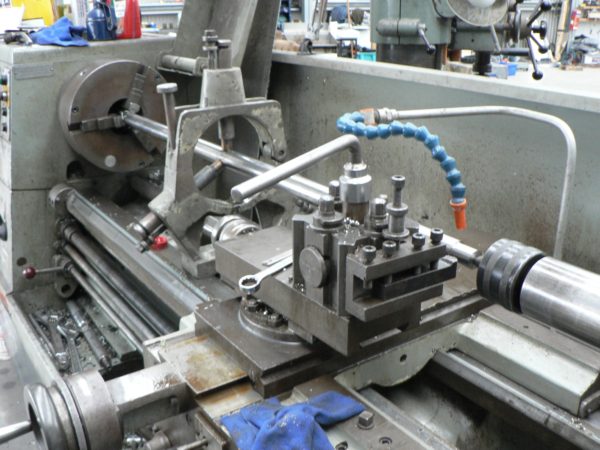
The shaft was transferred to a milling machine…

… and the keyway slot cut.
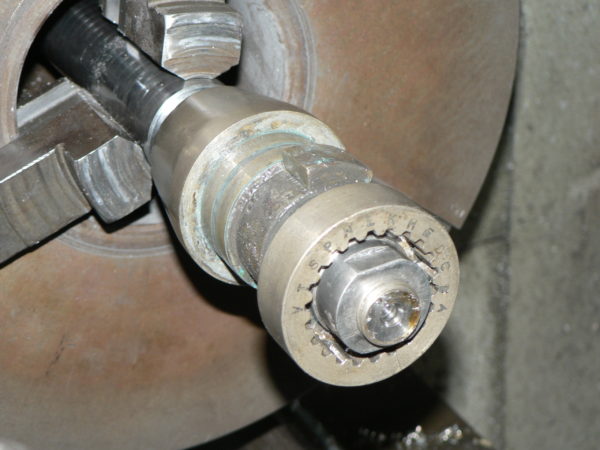
Propeller boss and retaining nut on the shaft.
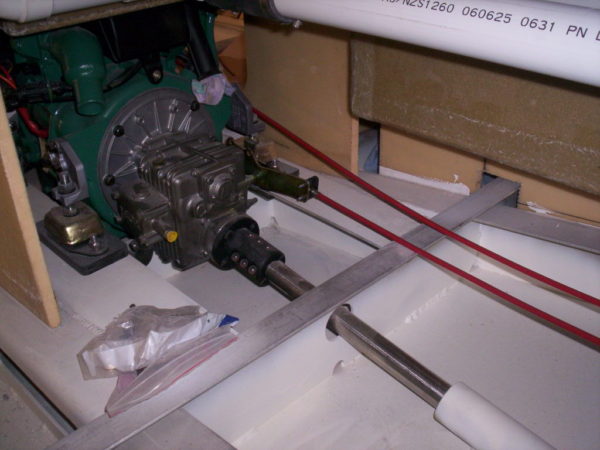
The completed shaft is used for aligning the engine. Note the electrical insulation underneath the engine mounts. Very simple, basic attention to such details means that the alloy hull is not connected to any other immersed metals or the batteries ground. Morse cables and fuel connections are the other points where grounding can easily occur.
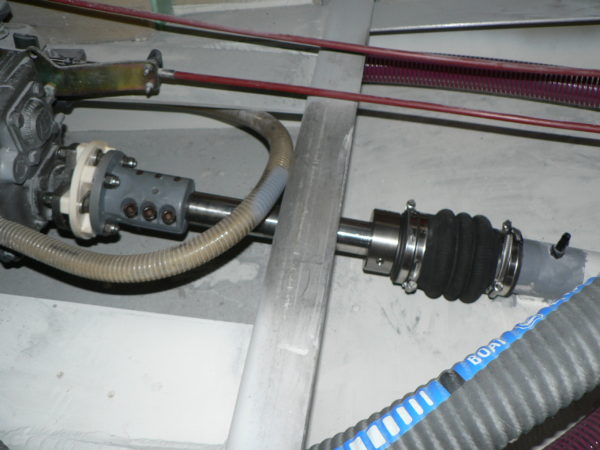
The shaft seal was later installed. A flexible shaft coupling as shown is a very bad idea with a shaft that is unsupported at the seal. It was later replaced with a solid aluminium spacer. Preserving electrical separation between shaft and engine is a good move if possible.
Rudder Stock Head
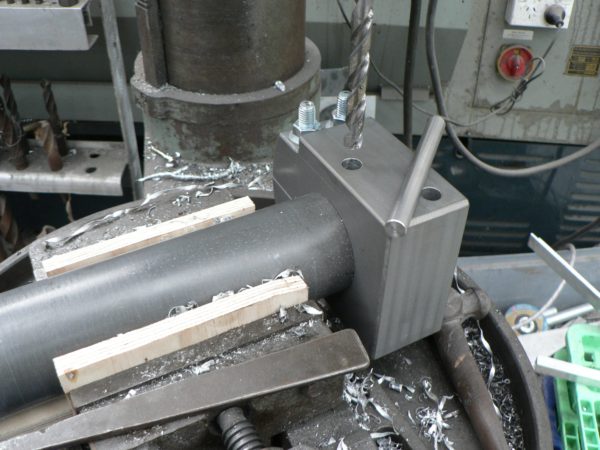
The rudder stock head was turned and milled out of a solid block of aluminium before hard-anodising. Once the rudder blade was complete, the head piece was positioned on the stock, aligned, clamped into place and the lot drilled through for a dowel pin.
Electrical Construction

Electrical construction work started from the engine… starter, ground and alternator cables.
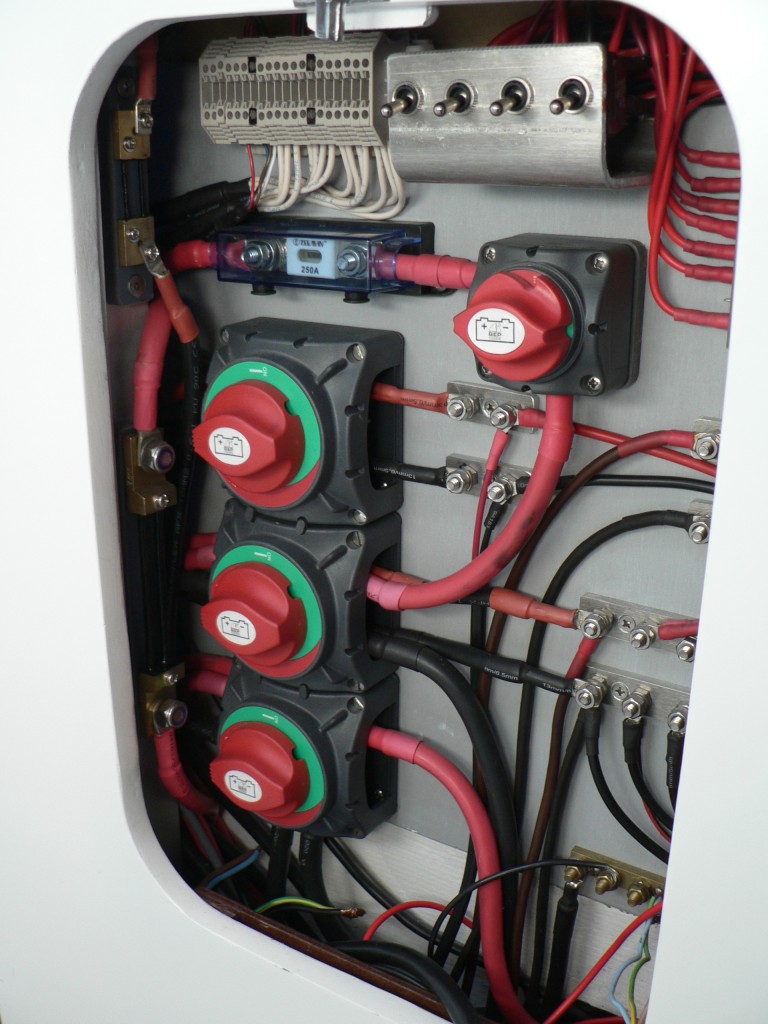
The main DC distribution panel deals with the battery banks, inverter feed and charging systems. Two-pole battery switches were used for all three separate battery systems.
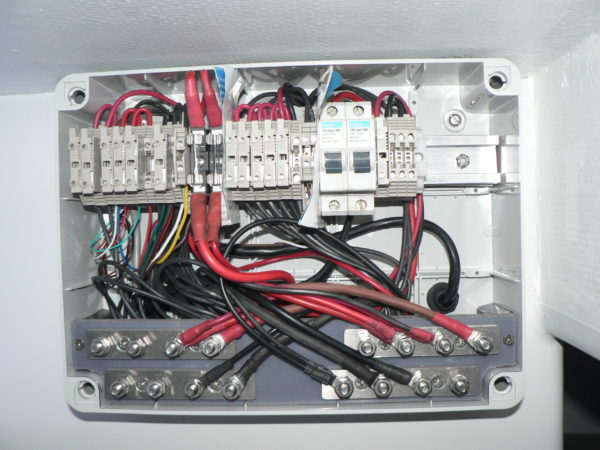
Wiring gradually spread out. Three simple distribution nodes were created. The use of LED lighting throughout meant low currents and small cables. No nonsensical DC bus and control system was ever considered: the technology used here will still be fully maintainable in 20 years without complete replacement.
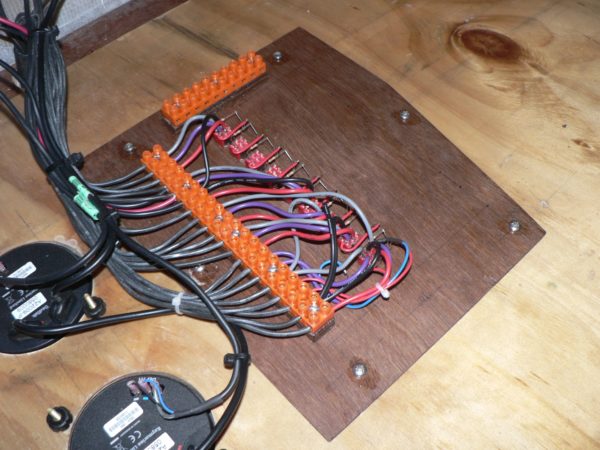
Keeping electrical work tidy does pay off. Most on-board circuits are too simple to warrant producing fully detailed electrical design drawings before tackling the work; single line diagrams are more than adequate to assess materials requirements. However, documenting all junction boxes and terminal blocks and recording all cables, core numbers and colours during construction is invaluable.
Hi Eric,
So that’s what’s in the skinny ‘box’ companionway port side; and a good bum brace for the cook as well!
I assume the step and landing come away for engine access – but what about access to the side and rear, especially assuming you installed thorough sound insulation. Do you have any photos?
And where do hang your foulies on coming below – don’t tell me you have to drag them through the saloon to the heads.
Regards – Peter
Peter,
Correct. The skinny box contains the main DC power distribution. It is very close to the engine, alternator and batteries, dry and never hot. Bracing against it at the galley was the design intent and it works very well. If anything, I would make it longer and overlapping the stove some more.
The whole step landing simply lifts off (it is very light, you can carry it with one hand) and there is side access from each one of the aft cabins, as well as access behind (underneath the cockpit) through large panels in the port aft cabin. This allows reaching the shaft seal, exhaust muffler/water trap and some bilge plumbing.
Removing the steps also allows for a straight lift out of the engine, using the boom above or with a crane. It couldn’t be easier or more maintainable. I will add some photos for you, but I might need a few days.
I have some soundproofing material I haven’t so far bothered with (!), first because the engine is not very noisy surrounded by foam core panels, and also because I have only managed to put 107 hours on the clock in 6 years. The ability to sail in very light winds and also point very high upwind means that there are a lot less reasons to motor. Sailing beats soundproofing by a long way. Some soundproofing will get added one day or another, but it is not very high on the list.
I leave my wet weather gear at the entrance on the companionway steps or (rarely) hang it underneath the hatch in front of the galley. It wouldn’t work with a crew going in and out all the time, but it is workable short-handed. It would be easy enough to replace the small lateral seat and shelves in one of the aft cabins with a wet locker, and then it could go in there. Boat layouts are very flexible and I always say that, if you build something new, you should decide what you want and how you want it. Otherwise, what is the point of a custom build? Have it your own way, it is your boat, it only needs to please you.
Some things also originate from the way I sail: I very seldom hang around outside. I have outstanding self-steering arrangements, I set everything and then head down below, where it is infinitely more comfortable than any damned cockpit. Then I regularly peek outside to keep an eye on what is happening, but I don’t spend time in the cockpit. This means that a lot of wet weather stays outside and doesn’t get at me. Occasionally, I have no choice but stand out in the rain…
When I get out, I want to be in the middle of the action with unimpeded access to the helm, winches, steering vane and everything else with a full view, so boat handling is 100% efficient.
Best regards,
Eric