
Appendages
Construction of the appendages was placed in the harder basket and deferred until the hull had been built. This was also good work for the winter, when working with filler is slow and painting is not really possible due the colder temperatures.
Keel Construction
The keel foil – easy to make – was built as an alternative task as the hull was being faired in order to allow fitting it into the hull slot. The two thick side plates were shaped in a folding press and butted into a solid rod at the leading edge. It was finished before I had a chance to take a photo of it! The key challenge when building metal foils is controlling twist between top and bottom and keeping the trailing edge straight: welding it while it is being held straight in the press does wonders in this direction.
The keel bulb and rudder were manufactured last due to the tight curves and thickness of the material for the keel bulb.

The keel bulb framing was assembled following the same system of interlocking slots as the hull floor girders.

The thick centre strip was shaped and fully welded in. The holes in some of the sections will allow the lead to flow through into the nose and the tail of the beast, which is over 2.5 metres long.

The bulb framing was heavily welded into the keel foil and then plated. Note the trailing edge of the keel foil, still untrimmed: the side plates are offset, allowing one single weld away from the edge. The plate extending back will be bevelled into a feathered edge. This is much more efficient and stronger than building up the trailing edge with the MIG and grinding it! Epoxy filler will be used for fairing the weld area: no filling with the MIG, we don’t need the intense heat and distortion that comes with unnecessary welding.

Each plate was carefully marked and pre-cut. The technique is the same as the one used by the old shipwrights when lofting planks. A long steel ruler was used as a batten on the bulb frames, an approximate centreline marked and offsets taken on either side at intervals. The excess material outside the blue lines is needed for pressing in a V-block, see below.

The plate was then pressed into shape over a V-block using a specially-made curved tool. Bulb plates required more pressure and tighter curves than what the wheeling machine could handle. Small templates were used to gauge the shape at each station.

The finished plate will be sprung into place with a little assistance from clamps and welded.

The alloy keel bulb casing will be filled with molten lead.
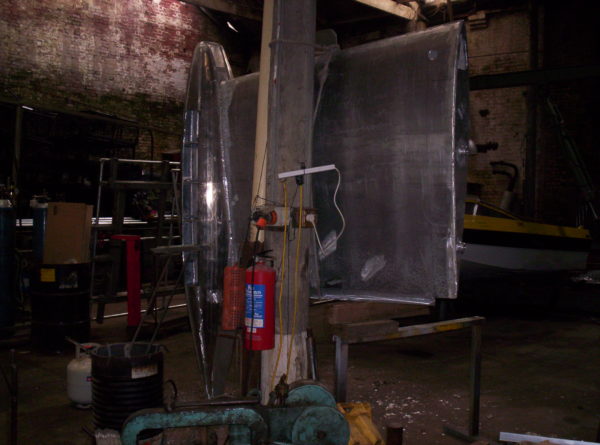
The ends needed to be filled first, so the keel was stood up and secured for the pour. 9kg of propane allowed melting about 500kg of lead.

The middle section was filled last, flat on the floor. The remaining opening was then closed.

Once sandblasted and primed, the bulb bottom was sheathed in Kevlar/epoxy for abrasion resistance and the weave filled with a high-density filler with no delay. Kevlar cloth is a very interesting product to cut unless one happens to have the right type of razor-sharp, serrated scissors. I didn’t.

The massive object was faired and the bottom antifouled while still easy to get at. A forklift was of invaluable help for handling the keel.
Rudder
The rudder was built on a hard-anodised high-tensile aluminium stock.
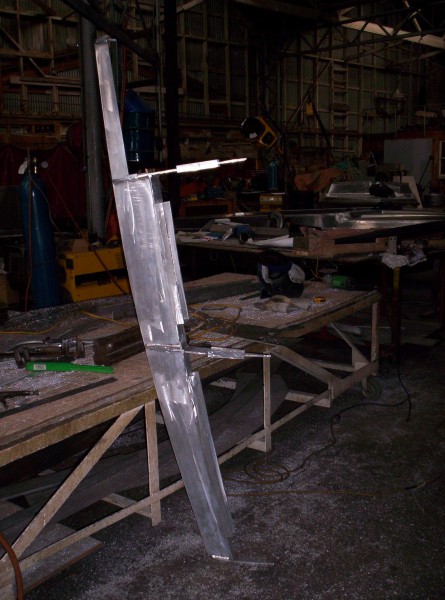
The skeleton of the foil was assembled…
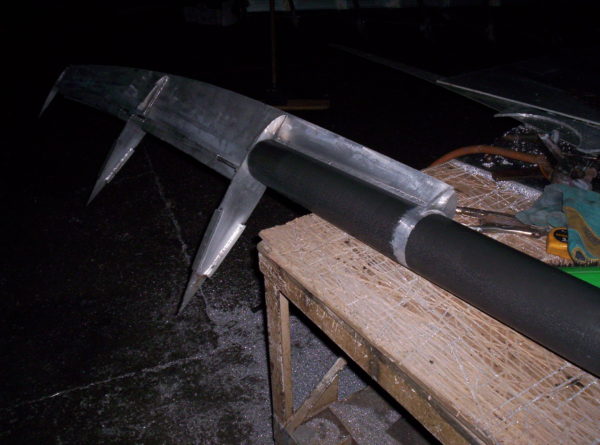
… and heavily welded into the stock.

Pre-cut shells were formed through a combination of wheeling and pressing and the framing was simply fitted inside. The section shape keeps changing throughout. Symmetrical slot-welding of the skins is important to keep the blade straight and untwisted.

The completed blade was sandblasted, primed, faired and painted, taking great care to protect the anodised layer on the stock.
The appendages were added to the hull in the process of finishing the shell.
Hi Eric,
Did the top of the keel bulb create a sufficient end-plate effect to allow you to use a constant section in the foil?
Thanks – Peter
Peter,
Yes, I used a constant section. I didn’t need volume in the lower part because of the bulb, so strength at the root and hydrodynamic considerations are what decided its shape. The hydrodynamic effect of bulbs upwind is not obvious. You really need to shape them like a small horizontal slab or add wings to them to (hopefully) get an end-plate effect and then you also incur the additional wetted surface. It is easy to end up worse off. The value of the bulb is found in terms of stability and reduced ballast.
Eric